Best Home 3D Printers for Beginners in 2026: Easy, Reliable, and Modern
Discover the top home 3D printers for beginners in 2026, featuring auto calibration, easy setup, and support for key materials like PLA and PETG. This comprehensive guide compares leading models from Bambu Lab, Creality, Elegoo, and Anycubic, helping you choose the right printer for your needs and budget.

Home 3D printer technology in 2026 no longer demands constant manual adjustment or deep technical know-how. Today's FDM models feature automatic bed leveling, first layer height detection, filament flow control, and ready-made material profiles, making it much easier for beginners to get started compared to a few years ago.
For new users, reliability is more important than maximum speed or endless technical settings. A good first printer should be easy to set up, print well with popular materials like PLA and PETG, and not require constant bed tweaking or fussing with dozens of slicer parameters.
This guide reviews the best 3D printers for home use and beginners in 2026-from compact models for first projects to more versatile units with spacious build volumes and enclosed frames. We'll also discuss which features really matter and which ones aren't worth extra money.
How to Choose a Home 3D Printer Without Overpaying
When shopping for your first home 3D printer, it's easy to get distracted by specs like maximum speed, hotend temperature, or supported materials. In reality, stable operation, simple setup, and minimal manual steps before each print are far more important for beginners.
Auto Calibration and Easy First Prints
One of the most useful features for beginners is automatic bed leveling. The printer measures the build surface and compensates for small height differences, ensuring a uniform first layer.
It's even better if the printer can set the Z-offset-the gap between nozzle and bed-automatically. On older or simpler models, this must be done manually, and even minor errors can ruin adhesion.
For your first printer, choose a model that requires minimal work after assembly: load the spool, insert the filament, run calibration, and start printing.
Build Volume Size
Build volume defines the largest object you can print at once. Compact printers with around 180 × 180 × 180 mm are great for figurines, small mounts, and household accessories.
Printers with 220-256 mm on each side are much more versatile. They're ideal for enclosures, large decor, organizers, and project parts without splitting models into pieces.
Bigger build volumes, however, mean larger printers. Consider not only the printer's footprint but also space around it, especially if the bed moves forward and backward during printing.
Print Speed and Quality
Modern FDM printers may boast speeds of several hundred mm/s, but the top speed doesn't mean you should print that fast all the time.
As speed increases, so do acceleration and vibrations. If the printer can't compensate, you'll see waves, layer shifts, and other defects.
So, don't focus solely on max speed. Look for vibration compensation, stable mechanics, and quality slicer profiles. For home printing, the difference between 300 and 500 mm/s is often less important than good tuning.
PLA, PETG, and TPU
PLA is the best starter plastic-easy to print, minimal warping, and suitable for decorative models, prototypes, and most home projects.
PETG is tougher to dial in but handles stress and heat better. It's popular for brackets, enclosures, and functional parts.
TPU is a flexible material for cases, gaskets, and soft parts. If you plan to use it, look for a direct-drive extruder for easier flexible filament printing.
Support for ABS, ASA, and engineering plastics might matter later, but for your first printer, these aren't essential. Such materials require higher temperatures and, ideally, an enclosed frame.
Noise, Camera, Wi-Fi, and Apps
If your printer will be near your workspace or used in the evenings, noise level matters. Not just fans, but also rapid printhead and bed movements create sound.
Wi-Fi allows sending files without SD cards, and a built-in camera lets you monitor prints and catch failures early. These features are nice, but not critical for beginners-though they add a lot of convenience.
A branded app and well-tuned slicer are also valuable. The less you need to tweak manually, the easier it is to focus on real projects instead of constant printer adjustments.
The Best FDM 3D Printers for Beginners in 2026
For your first printer, don't choose by max speed or nozzle temperature alone. It's far more important how easy it is to set up, how reliably it prints, and what materials you can use after mastering PLA. Here are five FDM models for different home printing needs:
Bambu Lab A1 mini - Best Compact First 3D Printer
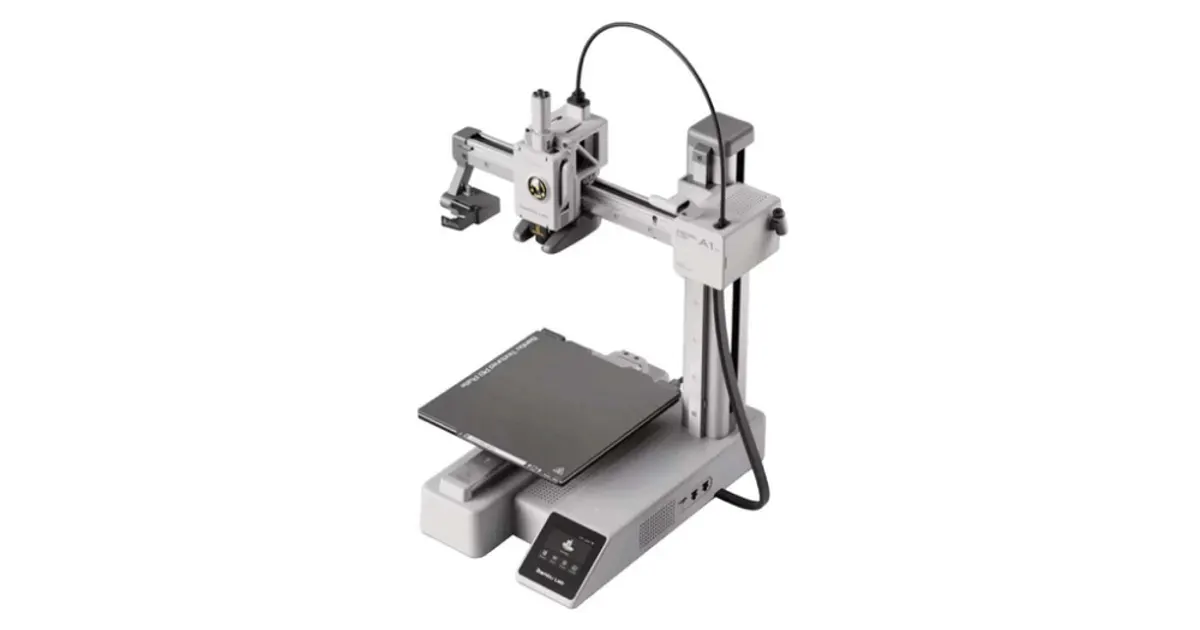
The Bambu Lab A1 mini is ideal for those new to 3D printing who want to avoid lengthy setup. Its 180 × 180 × 180 mm build area means a small footprint-perfect for figurines, organizers, mounts, electronics parts, and home projects.
The hotend reaches up to 300 °C, recommended for PLA, PETG, TPU, and PVA. Printhead speed is up to 500 mm/s, though typical printing doesn't require max speed.
The standout feature is automation: no constant manual first layer or calibration required. You can also use it with AMS lite for multi-color printing.
The main limitation is the small build area. It's sufficient for small items, but larger objects must be split. The A1 mini is best viewed as a compact starter printer, not an all-rounder.
Bambu Lab A1 - Versatile Home 3D Printer
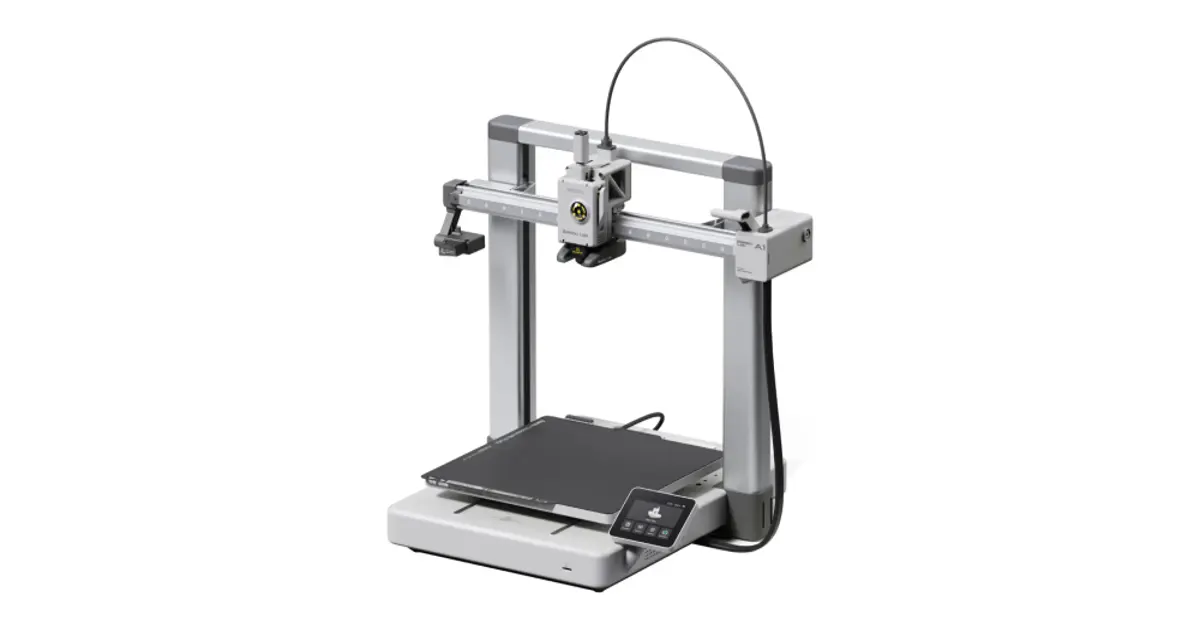
If you have space for a larger unit, the Bambu Lab A1 removes the main limitation of the mini. Its 256 × 256 × 256 mm build area is enough for most projects without splitting models.
The printer features a 300 °C hotend for PLA, PETG, TPU, and PVA. Printhead speed is up to 500 mm/s, acceleration up to 10,000 mm/s². It includes Wi-Fi, app and Bambu Studio control, a camera, and a filament runout sensor.
The A1 works much like the mini: load your model in the slicer, pick a material profile, and print. It's perfect if you want to focus on making parts instead of constant setup.
The trade-off is a focus on the Bambu Lab ecosystem and open frame. ABS, ASA, PC, and PA are not recommended. If you only need PLA, PETG, and TPU, this isn't an issue, but for regular engineering plastics, opt for an enclosed printer.
Creality Ender-3 V3 - For Tinkerers Who Want More Control
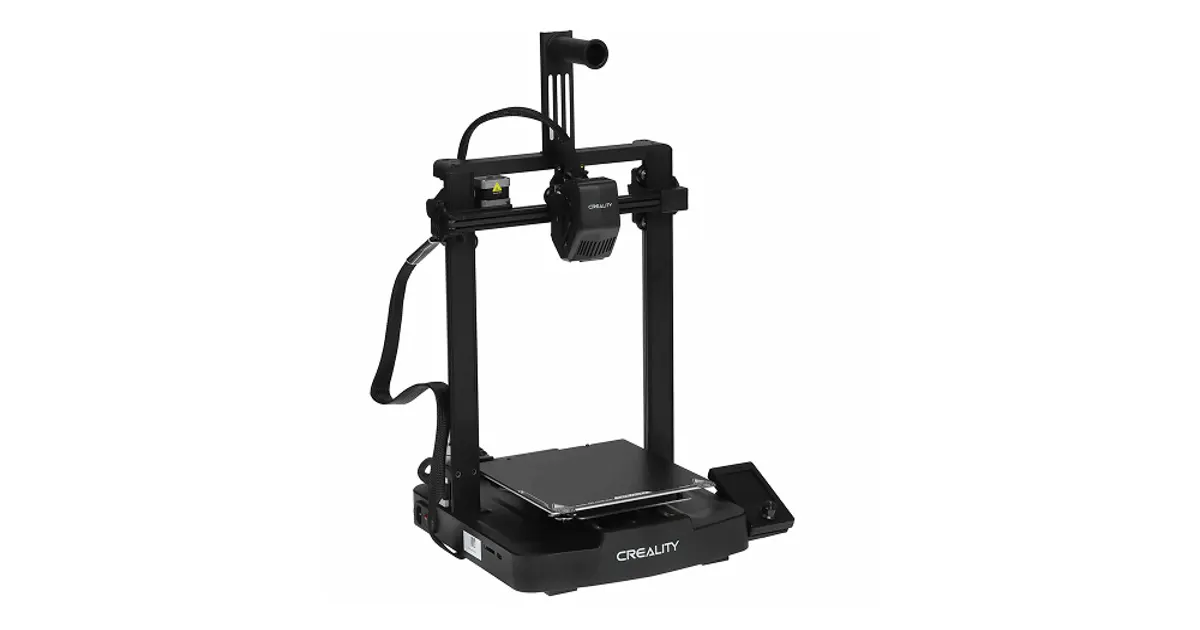
The Ender series built its reputation on budget printers that needed lots of tinkering. The Ender-3 V3 is a leap forward, with auto bed leveling, Z-offset, and vibration compensation.
It offers a 220 × 220 × 250 mm build area, CoreXZ motion, direct drive extruder, and 300 °C hotend. Creality lists max speed at 600 mm/s, acceleration up to 20,000 mm/s², but recommends 300 mm/s for best results.
You can print PLA, PETG, TPU, ABS, and composite filaments like PLA-CF and PETG-CF. File transfer is via USB or Wi-Fi; the main slicer is Creality Print.
This model is for users who want a modern printer with automation but also crave customization and community support. Creality's ecosystem is more open, and the design encourages experimentation.
If you don't want to touch printer settings, the Bambu Lab is simpler. But if you see 3D printing as a technical hobby, the Ender-3 V3 is a compelling choice.
Elegoo Neptune 4 Pro - Maximum Features on a Budget
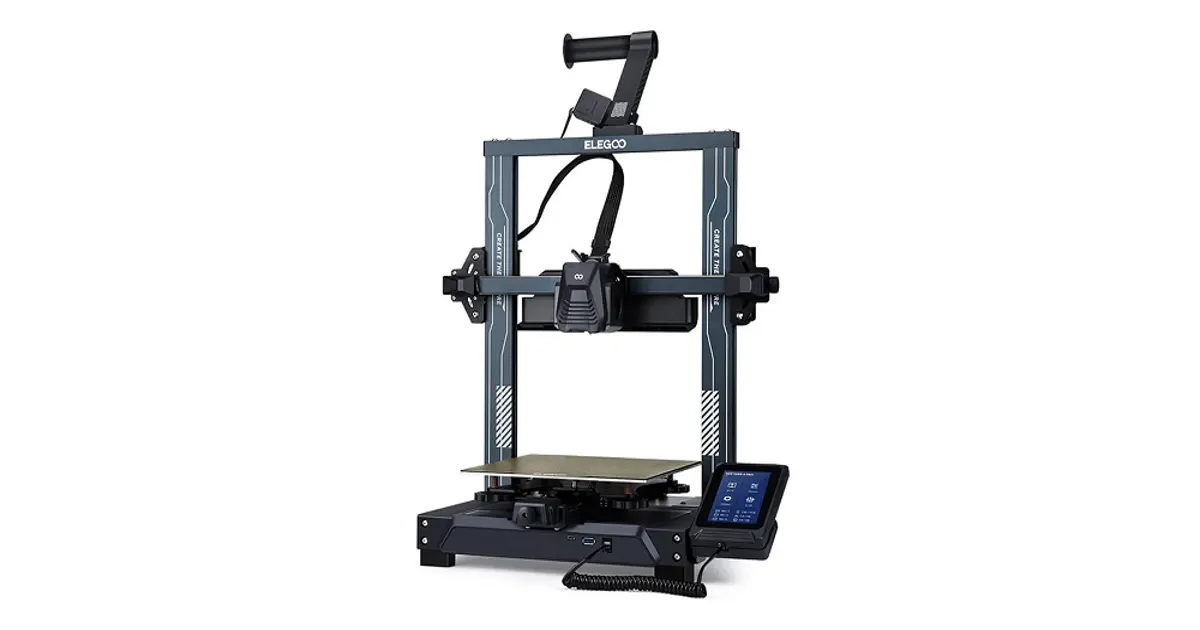
The Elegoo Neptune 4 Pro is an appealing option for those who want a big build area and features without a high price.
It boasts a 225 × 225 × 265 mm print size, dual-gear direct drive extruder, 300 °C hotend, and a 121-point auto bed leveling system. It runs Klipper firmware with input shaping and pressure advance for smoother, more accurate prints.
Maximum speed is 500 mm/s. Supported materials include PLA, PETG, TPU, ABS, ASA, and Nylon. The open frame means printing large ABS or ASA parts at home is still a challenge.
The Neptune 4 Pro is best for those willing to learn about slicers and Klipper settings. It's harder to master than the A1 line, but offers more room for fine-tuning and experimentation.
Anycubic Kobra S1 - Enclosed Printer for Advanced Materials
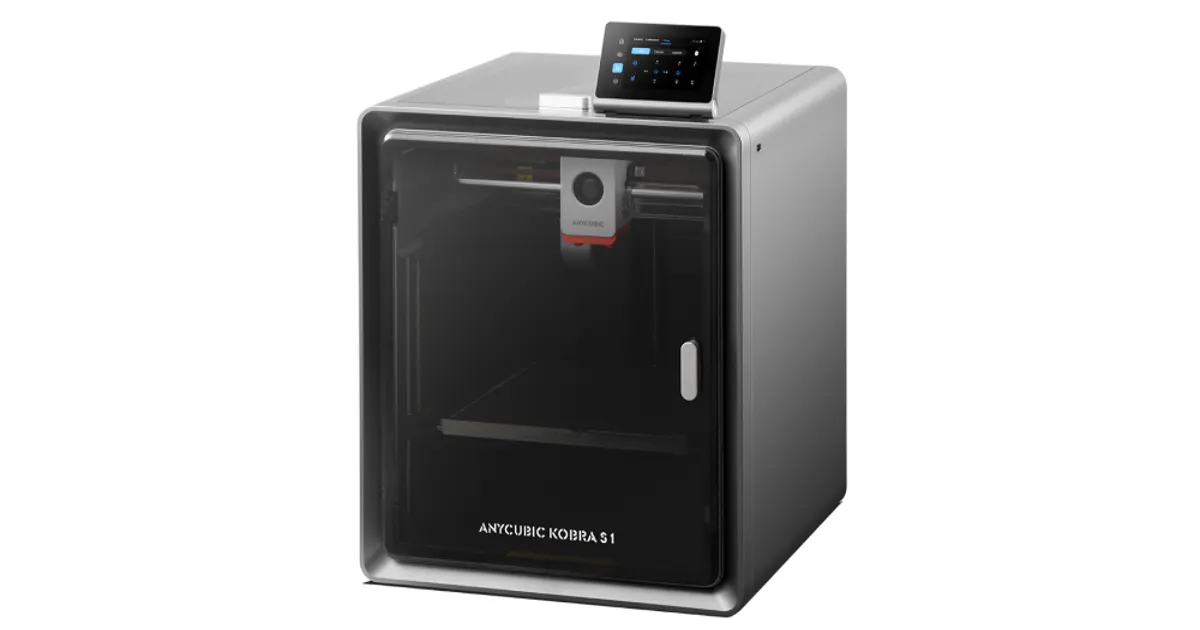
The Anycubic Kobra S1 stands out for its enclosed CoreXY design and 250 × 250 × 250 mm build area, making it ideal for those who want to print beyond PLA.
The hotend heats up to 320 °C, the bed up to 120 °C. Supported materials: PLA, PETG, TPU, ABS, ASA. The enclosure stabilizes temperature, critical for plastics prone to warping.
It features LeviQ 3.0 auto bed leveling and Z-offset, vibration compensation, flow control, filament runout and tangle sensors, and auto failure detection. Recommended speed is 300 mm/s; max is 600 mm/s.
Through the Anycubic App, you can manage and monitor prints remotely. The Kobra S1 Combo version supports multi-color printing via the ACE Pro system.
If you mainly print small PLA models, the enclosure may be overkill. But if you want to use ABS, ASA, and other demanding materials, the Kobra S1's capabilities let you grow without upgrading your printer.
Comparison Table: Best Home 3D Printers 2026
| Model | Build Volume | Auto Calibration | Nozzle Temp | Main Materials | Enclosure | Multi-Color |
|---|---|---|---|---|---|---|
| Bambu Lab A1 mini | 180 × 180 × 180 mm | Yes | up to 300 °C | PLA, PETG, TPU, PVA | No | AMS lite |
| Bambu Lab A1 | 256 × 256 × 256 mm | Yes | up to 300 °C | PLA, PETG, TPU, PVA | No | AMS lite |
| Creality Ender-3 V3 | 220 × 220 × 250 mm | Yes | up to 300 °C | PLA, PETG, TPU, ABS, composites | No | No |
| Elegoo Neptune 4 Pro | 225 × 225 × 265 mm | Yes | up to 300 °C | PLA, PETG, TPU, ABS, ASA, Nylon | No | No |
| Anycubic Kobra S1 | 250 × 250 × 250 mm | Yes | up to 320 °C | PLA, PETG, TPU, ABS, ASA | Yes | ACE Pro |
The A1 mini has the smallest build area (180 × 180 × 180 mm), while the A1 offers a much roomier 256 mm cubed. Both mainly target PLA, PETG, and TPU; tougher materials like ABS and ASA aren't recommended.
Creality Ender-3 V3 sits in the middle: 220 × 220 × 250 mm, auto calibration, max speed 600 mm/s. Its strengths are an open ecosystem and more hands-on tuning versus older, manual Ender models.
Neptune 4 Pro offers a similar build area (225 × 225 × 265 mm), 121-point calibration, and Klipper firmware. It's a great value, but beginners will need to pay more attention to slicer profiles and settings.
Kobra S1 stands out for its enclosed CoreXY frame, 250 × 250 × 250 mm area, and 320 °C hotend. The enclosure makes it the best choice here for regular ABS and ASA use.
A1 mini or A1?
The real question is about size, not print quality. For figurines, small mounts, organizers, and learning the ropes, the A1 mini is often enough.
Pick the A1 if you want a more versatile printer from the start. The 256 mm build area lets you print bigger items without splitting, while setup remains beginner-friendly.
Bambu Lab vs. Creality and Elegoo
Bambu Lab focuses on a tightly integrated ecosystem: printer, slicer, material profiles, and auto calibration all work seamlessly. This is perfect if you want to start printing right away.
Creality and Elegoo are better for those interested in the technical side of 3D printing. You'll get more room for manual tuning and experimenting with profiles and printer behavior.
That doesn't mean the Ender-3 V3 or Neptune 4 Pro are difficult to use-they also have auto bed leveling and modern vibration compensation. The difference is how often you want (or need) to tweak things yourself.
Open vs. Enclosed 3D Printers
For PLA, PETG, and TPU, an enclosure isn't required. So open printers like the A1, Ender-3 V3, and Neptune 4 Pro are fine for most home tasks.
Things change with ABS and ASA. These plastics are sensitive to drafts and temperature swings, leading to warping and detachment. An enclosure helps keep conditions stable.
There's little point buying an enclosed printer just for PLA. But if you know you'll be printing functional ABS or ASA parts, the Kobra S1 offers more flexibility for future needs.
What Else You'll Need Besides the Printer
The printer is just the start. You'll also need filament, a few simple tools, and a dedicated spot where the printer can run for hours without interruption.
Which Filament to Buy First
For first prints, go with standard PLA. It's easy to use, rarely warps, and doesn't need an enclosure. Perfect for learning slicer settings like infill, supports, and layer height.
After mastering PLA, move to PETG. It's stronger, handles moisture and heat better, and is great for brackets, enclosures, and functional parts. PETG needs more precise first layer and retraction settings.
TPU is best saved for later-it's flexible, ideal for gaskets, shock absorbers, and soft cases. Modern direct-drive printers handle it better, but you'll still need to print slower.
Start with one or two PLA spools in different colors. There's no need to buy a collection of ABS, ASA, Nylon, or carbon/glass composites right away: some are harder to print, and some wear out regular brass nozzles quickly.
Do You Need Spare Nozzles and Tools?
Most printers come with basic tools, so you don't need a huge toolkit up front. Useful extras include side cutters for supports and filament, a small tweezer, and a tool to clean the bed.
A spare nozzle is handy but doesn't need frequent replacement. Standard brass nozzles work well for PLA, PETG, and TPU. Hardened steel nozzles are only necessary for abrasive materials like carbon/glass-filled filaments.
Clean the bed with isopropyl alcohol or wash with dish soap now and then. Finger oils reduce first-layer adhesion over time, even on quality PEI sheets.
A spatula isn't always needed. On flexible magnetic plates, most prints pop off after cooling and flexing. Using a metal scraper can sometimes damage the surface.
Where to Find Printable Models
You don't need to learn 3D modeling right away. Thousands of ready-to-print STL and 3MF files are available online: organizers, stands, brackets, figurines, cases, and spare parts.
Before printing, you load the model into your slicer, where it's turned into layers and nozzle paths. That's where you set material, layer height, infill, supports, and more.
3MF is becoming especially convenient for beginners, as it can include both geometry and project settings. Still, always check your printer profile and filament type before hitting print.
As you progress, you may want to design your own parts in simple CAD software-custom holders, adapters, enclosures, and more. The ability to quickly create custom components is a major advantage of home 3D printing.
How Much Space Does a Home 3D Printer Need?
Don't go by the printer's size alone. On models with a moving bed, the build surface shifts back and forth, so you'll need extra space around the unit.
The spool holder may be at the back, and multi-color systems could sit above or to the side. Leave room for accessing the printer for filament changes, bed cleaning, and printhead maintenance.
Use a stable surface, since fast models create noticeable vibrations-a wobbly table will amplify noise and movement.
Consider print times too: a small figurine can take hours, while a large part may run all day. A permanent spot in a dedicated workspace is often more convenient than a table you need to clear off frequently.
Which 3D Printer Should a Beginner Choose?
Don't obsess over finding the one "perfect" model. The right choice depends on what you want to print, how much you value simplicity, and whether you need future-proofing for tougher materials.
- To try home 3D printing with minimal setup, the Bambu Lab A1 mini is incredibly user-friendly-compact, automated, and perfect for PLA, PETG, and small objects. Its main limitation is the 180 × 180 × 180 mm build area.
- For greater versatility at home, pick the Bambu Lab A1. The 256 × 256 × 256 mm area lets you print much larger items, with the same beginner-friendly setup. This avoids needing to upgrade just for more space.
- The Creality Ender-3 V3 is for those interested in both making and tinkering. It's automated enough for starters but offers more room for tuning, profiles, and modifications.
- The Elegoo Neptune 4 Pro is for users seeking lots of features on a moderate budget and willing to learn more about slicers and Klipper settings. It's a good fit for those unafraid of manual tweaks in exchange for flexibility.
- If you plan to work with ABS, ASA, and other temperature-sensitive materials, go for an enclosed printer like the Anycubic Kobra S1. Its enclosure and higher temps future-proof your setup, though these features are overkill for regular PLA printing.
For most beginners, the key is to choose ease of use over maximum speed. Auto calibration, a stable first layer, intuitive slicer, and solid material profiles are more valuable than a few extra mm/s.
Conclusion
For a first home 3D printer in 2026, ease of achieving great results without constant tinkering beats top speed. Auto calibration, a reliable first layer, user-friendly slicer, and well-tuned material profiles make FDM printing approachable for newcomers.
If you want the simplest start and will print small models, the Bambu Lab A1 mini is a top pick. For a more versatile build area, the Bambu Lab A1 is a better choice. Creality Ender-3 V3 and Elegoo Neptune 4 Pro are best for those who enjoy fine-tuning and experimentation. Choose the Anycubic Kobra S1 if you need an enclosure and plan to print with demanding materials beyond PLA and PETG.
Usually, all a beginner needs is a decent printer, a spool of PLA, and a few ready-made models to get started. From there, you'll quickly discover if you want a larger build area, multi-color system, engineering plastics, or more advanced manual setup.
Tags:
Similar Articles